Sunday, August 9, 2009

Cap Kit - WIN! And now my Lock'n Chase is about 90%


Well, well, well. The kids and wife left to go to see a friend for the weekend. My son is now potty trained, so so it was the "Magical Train Ride" we'd promised him. That's a picture of him waiting for the train. I wanted to go, but Jenny's friend has 2 kids too, and they didn't have enough space in her car for 4 car seats and 4 adults. So, I stayed at home.

Spent about 5 hours total working on the Lock n' Chase. Had to figure out how to get it out first (see my last post). Turns out that once you take out the odd "metal frame" daughter card, you CAN get to the one nut you can see through the metal triangle shield part of the frame. Don't take off the two long ones.

So, for the Wells Gardner k4600, with the weird rails in the Taito cabinet (maybe cause it's vertical?), here's the take-apart steps. (I won't document taking off the wires. That should be self evident. I also won't document snipping the little plastic ring ties that are EVERYWHERE on the factory (I assume) setup.

1. Take off the 2 daughter cards. (xy and rbg I think are the names?)
2. Take off the black plastic bar. (You press in, and it pops off the pins.)
3. Pull up the black plastic knob and the white plastic nob.
4. Pull up the metal frame with the 3rd mini daughter card.
5. Where the black and white nobs where, and looking through the triangle sheet metal of the frame, you'll see 2 1/4" nut head screws. Take those out.
6. Pull the motherboard towards you. There are still 2 tabs in the back, right lined up with the tube. Tilt out, and it should come free.
7. NOW, you can find the 4 screws which hold the backing metal plate onto the 2 black plastic mother board holders.
8. Phew! That's it. Except that you might want to slip off the holders to get at some of the capacitors.
9. Note, the Bob Roberts kit instructions don't tell you that 2 of the capacitors are on the daughter card that on the metal frame. They are numbered correctly, but don't do a mini panic when you can't find 2 of your caps! :)

Here's me with my Hakko. Damn that thing's sweet.

I did my work in place, because there were too many things soldered to the monitor, and I 1. didn't want to take my monitor out and 2. didn't want to splice and solder wires later.

2 cardboard boxes (one flat, one raised) a flourescent light on a stick, and a rolly chair worked pretty well. I'm not saying it was a perfect experience for my back. But, it worked for me.

I probably spent an hour on adjusting it. Couldn't get it to come in at all at first. Tried hooking it up to the Turbo, got it a bit closer, but something wasn't syncing. Switched it back to the main boards, and it worked fine.


Feels so good to have everything plugged in now. With 5 machines in a row, it's nearly an arcade feel. I spent way too long with a dead machine in the row. Sure, sure, the sound went out (I know it works cause I bought the machine playing blind), and the joystick and control panel need some work. But, it's playable, and -most importantly- it's a 4-way vertical. Which means I can start working on wiring it up to be a switchable to the Amidar board I bought way too long ago.

Of course, I went to the Superauction in St. Louis on August first with my good friend Justin. And, I got a new idea for a project. Someone had a custom 48-1 mini pacman set up that went for $650. It had a tiny LCD VGA monitor on it, and it looked really sweet. I think I want to build one for the kids! Maybe someday, eh?

Thursday, July 23, 2009

WG k4600's - boards locked in - Grr

Well, the wife lets me have an hour or two of "Dad" time cause she took the kids to her mom's house. I decide to pull out the boards on my Lock N Chase. Look around. There seem to be a couple of hacks right at the neck board, but everything seems to have these clear little plastic bump ties like the board's never been touched. But, you definitely can't take the neck board or the main board out without cutting some wires. Geez. So, I look around, and decide I can do the cap kit with them hanging in the cabinet. No problem, right.

So, I get the neck board off, get the daughter cards, etc off, and then....

Day-yum. There seems to be no damn way to get the board off the cage. I've taken off way too damn many screws and it ain't budging, and then I realize that the board is on this black plastic frame. And I'm pinching and sticking my head up inside under the monitor. And I'm sweating and covered with monitor fuzz gunk, and my head hurts cause I keep bumping it into one of the wood blocks the door rests against.

And then I hear "HONEY, we're home, come help put the kids to bed."

*sigh*

Speaking of kids and things. Here's a few pics.

Best score in Top Score in a long time... I've had a few things sticking now and then since I don't get to play more than every 2 weeks in the summer. But, I've been able to narrow where, manually flip a few contacts which seems to eventually dislodge the stuck one, and get her running just fine. Wish I had more time to fix the spinner (which never registers 500 or add a bonus) and the Special light, which is even more random than ever.

My Girl at the pinball machine (You can see the scratchs on the side. This is stuff that makes collectors cry, but make Cheap players like myself happy - $350 for a completely playable EM with minor issues has been an awesome buy.)
My boy at the pinball machine. Yep, he knows how to start a game and is starting to learn how to play now. And yep, he is not wearing pants. LOL


So, at least I've gotten to enjoy the games some. I haven't fixed the Tubro graphics issue, but since it's playable, I don't feel bad about that.

And we got a Wii with William's Pinball - AWESOME game. Which was nice as I've been recovering from my accident. (Oh yeah, and I got hit by a car in February which has made life kinda crappy. Physical therapy for whiplash and a missing spleen are my rewards...)

And, I've made it out twice now to www.cppinball.com to play some incredible pinball machines - ALL NIGHT LONG. Yes.

SO, the last 6 months have been fruitful for actually playing games.

Plus, there is the arcade auction in St. Louis on August 1st, I'll get to go to that too. It's been a damn year since I've gone to one and I'm getting withdrawal!

I'll be back to blog again in 6 months when I get back to cap kitting, LOL...

Thursday, January 1, 2009

Cap Kit - WIN! And now..My Turbo is 95%!

Okay, so I got some GREAT help on the KLOV.com, coinopspace.com, and RGVAC groups. Turns out, my issue was I had the "Screen" knob on the flyback transformer cranked way up. And, everything else was out of whack too.

So, I tried the "screen", and failed. But, that was because I wasn't using a mirror, and was just running back and forth from back to front.

I found a cheap full length mirror, propped it up, and started working on it. By that point, I'd already started jumping it over to my Lock n Chase.

I have some old speaker wire from a cheap surround sound system that went tits up, so I just jammed that in the appropriate molex connectors, and found that I could mostly get it tuned it.

Damn, skippy, I was happy. So, I quickly hooked the Turbo back up, and boo yah!

In that picture, you can see how the left side of the screen had this weird "fold" in it. I was so damn happy, I didn't care, and played 20 games.

It was like 25 years ago, back in the day, at the Minot, ND "Bump N Tilt" free play arcade. The "drifting" game play using the pedal, and the "spin stop" motion of the wheel, and the way I'd spin in my initials "FUZ" on it.

You just can't beat that feeling.

You also can't beat the "my left leg has lost all feeling" feeling that Sega Turbo gives. LOL. Damn, I'd forgotten all about that! Since actually coordinating pedal movement with steering is key in Turbo, you really have to just fix on your left leg. And, after a while, it's painful.

I'm gonna have to get me a stool now. (I will anyway to help the kiddos play.)

Anyway, I fixed the fold by adjusting the vertical size... but I still have an issue. Aliens are eating the cars...

(The slight white line across the bottom of the screen is my hint the horizontal size is too big.)

Here's a video of the alien attack (before I'd fixed the vertical size issue...)


BTW, you'd think it's a "horizontal" size issue. But as James on RGVAC pointed out to me, every monitor is 4:3 horizontal. Even if it's mounted vertically. "Horizontal" always the long width.

Cap kit - FAIL!

2 weeks ago, I got up in there, and discovered 2 screws and 2 little nuts I could get to on the board. On a Turbo, there's 2 nuts right in front, the 2 screws are on tabs, about 8 inches back. (The board is a square, and they're right on the ends.) So, finally, I had my "way in". That was probably my biggest mental hurdle

4 days ago, I finally had time to put my capacitors on a styrofoam block. (awesome idea from that video.) The kids helped. It was kinda fun. I'd find a cap, start it, and they'd push it the rest of the way in.

Sunday, I got my light-on-a-stick, and assembled my tools.

Tuesday, finally, I had my opportunity... Everyone was downstairs.... the kids were playing nicely in the castle, the wife was on the couch reading a book, and so I snuck off.

Unhooking the cables was a snap. I had to use a stubby phillips head to get the 2 screws in the back out. And, I had to sit on a stool, and turn my head halfway up the game just to see the lower screw in the back. Almost stripped that one's head, but, I finally got them. The nuts in front were simple.

One note that wasn't in the guides was that, on the neckboard, there is a little "V" of plastic out the back that is the actual connector. I kept wiggling the board itself, and things weren't moving. Then, I tried the "V", and it worked great.

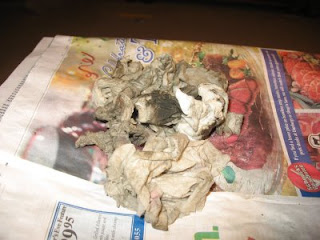
Here's my "workstation", LOL. That's newspapers on a vintage 70's TV tray, LOL.

Damn, some of the caps on that board are _really_ wedged in tight. Can you say, disgusting mess?


10 paper towels and 4 ounces of LA's Totally Awesome later...
Look at that. Purdy. Everything on that board, once cleaned a bit, looks like "the day it was installed", save for some surface rust on the metal surfaces. Mmmm, nachos!
But, I got in there and got the job done. (Nuts in place, screws not yet...)

But.... ARGGGGHHHH!!!! The Turbo STILL plays blind. Before the cap kit, these lines were just part of a bigger annoyance of a faded screen that collapsed into a vertical line straight down the center.


Can anyone help???

Triple boot iMac with Snow Leopard, El Capitan, and Batocera... Notes, Tips, Tricks, and Hints

Well, well, well.   I think I got it?  Use my notes at your own risk.  BACK UP BEFORE PARITIONING AND ERASE HD DATA! Here's the basics f...