I've never been a fan of the NES Zapper. It's heavy. It's clunky. The trigger pull is hard and after a lot of play time, your finger just feels terrible.
So, I decided to see if I could hack one. Here's pictures of what I did...
--------The Quicky tl;dr----------
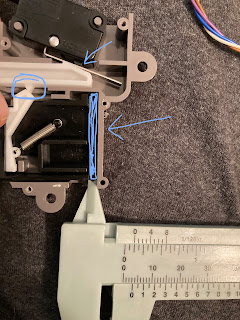
tl;dr ... Open your zapper, add a spacer in the spot with the big blue bar. This stops the "chachung" but still engages the microswitch.
That's it. Cut some plastic or other material to just under 1/8" thick, put it right where the bar is, and you have a great zapper!
(Also, note that I like a light light gun, so I took out both weights and left off the decorative case on the outside of the zapper too.)
-----------MODDED ZAPPER IN ACTION------------
You can see it in action at the end of this video I made about fixing the Trinitron's pits and dings. The last 4 minutes or so.
----------FULL NOTES-----------
Here's a bunch of pictures and some text of when I modified mine this way.
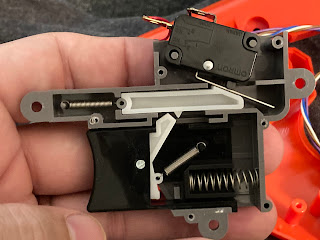
First, the mechanism... The reason for the big "kachunk" is that Nintendo made a spring loaded contraption that when you put the trigger in, it slides a white slider across that moves to press a microswitch.
You can see here, that right _before_ the "chachung", the trigger slides to that little white dimple and the microswitch is engaged.Then, AFTER the switch is engaged, but the trigger passes beyond the white dimple, the switch disengages, and the trigger is pulled all the way in with a huge, finger rattling "kah chung". At the point, the switch is no longer engaged and you've wasted a lot of strength/motion just making that "pow" happen.
The barrel weight is hollow so the sensor can shoot through it. The grip one is solid. Neither does anything but make the gun heavy. For me, I like to play for hours. A heavy gun is no fun for me.
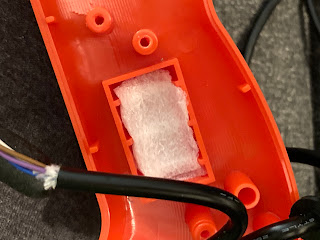
The foam that helps make the weight not rattle around.
About 1 3/16" long.
Somewhere between 1/8" and 1/16" inch should do it.

No no no...
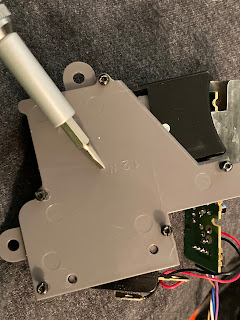
INSTEAD... leave the whole gray unit in the gun, and just take off the gray faceplate.
And remember, the big extra shell on the outside is also extra weight. I never put them back on. Just leave it like this.


No comments:
Post a Comment