The trials and tribulations of being a classic arcade video game and pinball enthusiast with 2 little munchkins and a full time job but a tiny leisure budget.
So, a while back, I got a lovely Sony Trinitron TV with SVideo inputs. Exactly the gaming machine I wanted. Brought it home from FB marketplace only to find it had all these little black dots on it. Looked into it, and my god, it looked like someone had dropped it on gravel or shot it with a BB gun.
Anyway, I just used RainX windshield repair on it and it fixed it right up.
The video attached is long and boring. And I'm just doing a photo dump here of how I did it. Mostly posting to give people the courage that this is an easy afternoon fix.
Can you see the dots?
I circled them with a dry erase marker.
Cut up the sheets in the kit into tiny squares. You just need to cover the actual damage, not a 2x2" square.
With the pieces cut, and the spots circled, I recommend cleaning with them high % Isopropyl Alcohol so the resin can get the best contact possible.
You really don't need the whole suction cup thing that comes in the kit.
Instead, just use this little push in thing to push the liquid in the cracks as far as possible.
That's it. Just push the plastic onto the resin so there's a thin layer and you don't need to scrap as much off.
You can see in the video, I had like 20-30 of these spots to fix!
When I took it outside, I found some extra spots I missed in the sunlight. The shadow really exposes them.
After filling in those extras, it was time for a cure! Cure baby Cure!
Use the razor blade to clean it off OUTSIDE. You get tons of little shavings everywhere. You don't want that in the house.
The spots are still slightly visible... but don't fear!
With the power on in the house....
They are practically unnoticeable! Certainly not anything you see while you're playing the game.
I've never been a fan of the NES Zapper. It's heavy. It's clunky. The trigger pull is hard and after a lot of play time, your finger just feels terrible.
So, I decided to see if I could hack one. Here's pictures of what I did...
--------The Quicky tl;dr----------
tl;dr ... Open your zapper, add a spacer in the spot with the big blue bar. This stops the "chachung" but still engages the microswitch.
That's it. Cut some plastic or other material to just under 1/8" thick, put it right where the bar is, and you have a great zapper!
(Also, note that I like a light light gun, so I took out both weights and left off the decorative case on the outside of the zapper too.)
-----------MODDED ZAPPER IN ACTION------------
You can see it in action at the end of this video I made about fixing the Trinitron's pits and dings. The last 4 minutes or so.
----------FULL NOTES-----------
Here's a bunch of pictures and some text of when I modified mine this way.
First, the mechanism... The reason for the big "kachunk" is that Nintendo made a spring loaded contraption that when you put the trigger in, it slides a white slider across that moves to press a microswitch.
You can see here, that right _before_ the "chachung", the trigger slides to that little white dimple and the microswitch is engaged.
Then, AFTER the switch is engaged, but the trigger passes beyond the white dimple, the switch disengages, and the trigger is pulled all the way in with a huge, finger rattling "kah chung". At the point, the switch is no longer engaged and you've wasted a lot of strength/motion just making that "pow" happen.
So, how can we deal with that. First, when you open up the zapper, you'll find the optics, plus two weights. PLEASE NOTE - I TOOK THIS WAY TOO FAR APART - GO TO THE END TO SEE HOW LITTLE YOU ACTUALLY NEED TO REMOVE.
The barrel weight is hollow so the sensor can shoot through it. The grip one is solid. Neither does anything but make the gun heavy. For me, I like to play for hours. A heavy gun is no fun for me.
The foam that helps make the weight not rattle around.
The trick for the trigger is to make it so it pulls in far enough to engage the switch, but so that it never actually pushes past the white dimple.
So, if you measure the back where the spring is, you can find some sort of plastic or other solid item of just the right size to go in.
About 1 3/16" long.
About 5/16 wide.
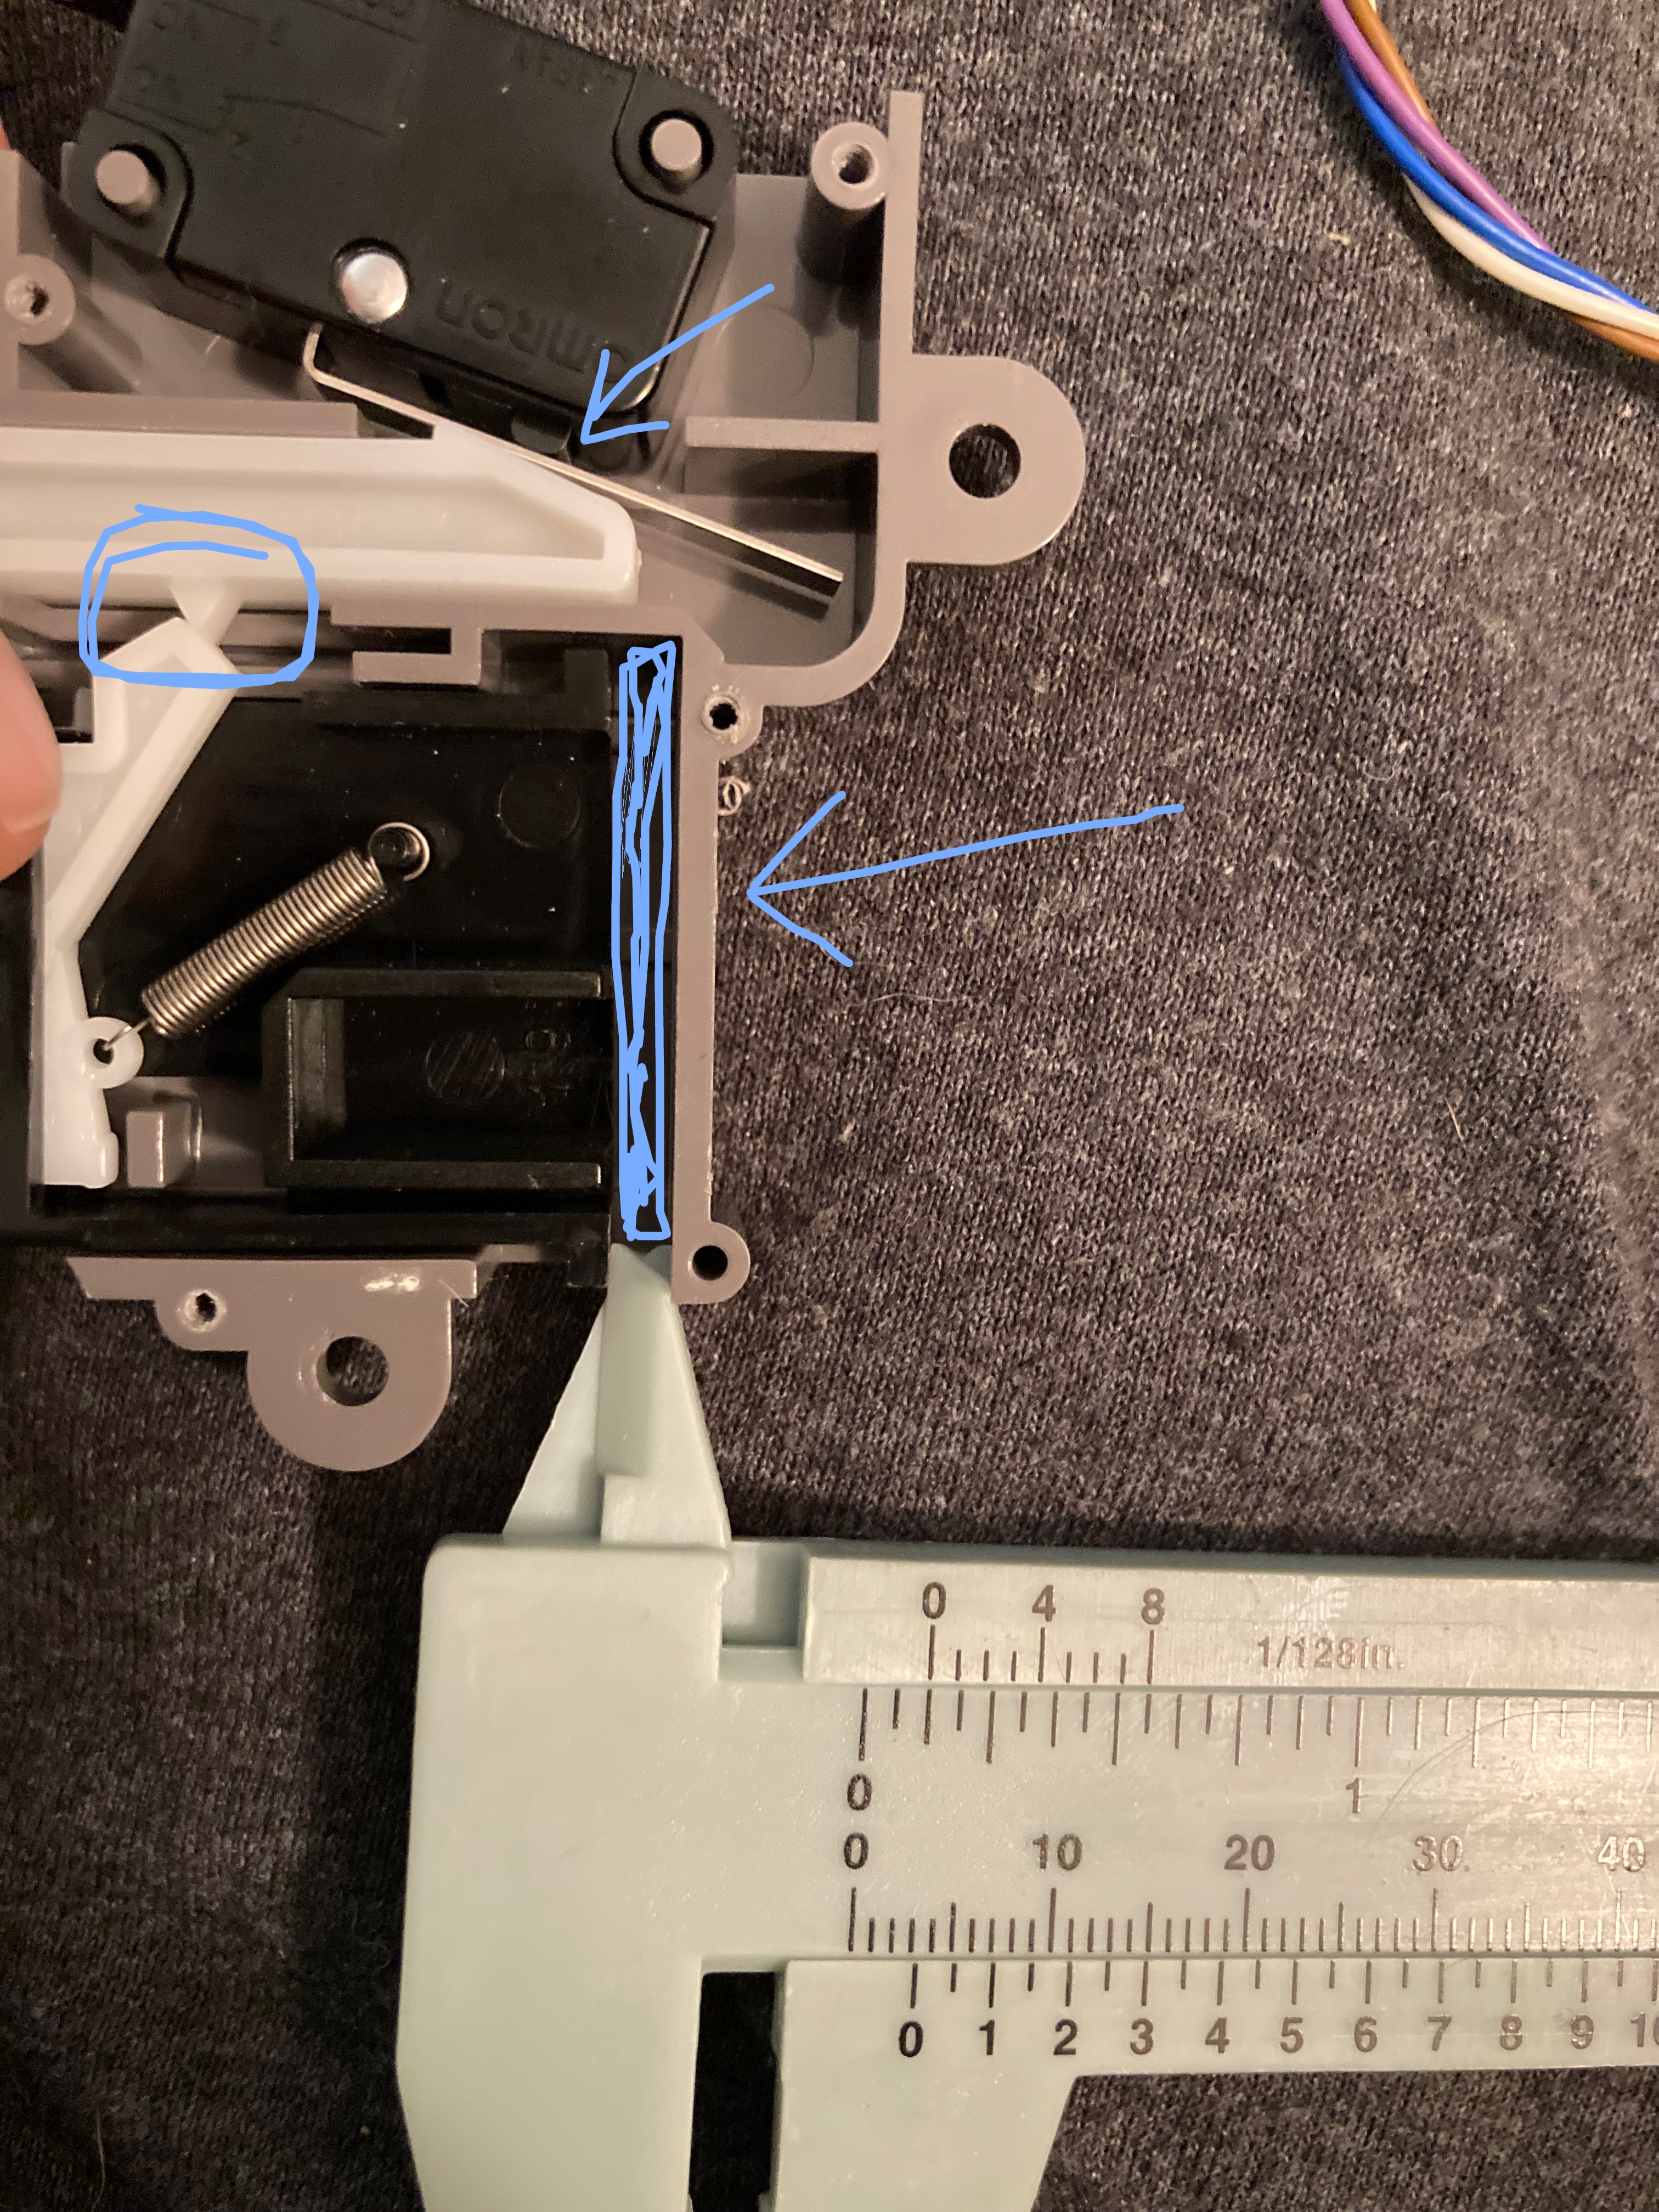
These next two pictures are the key pictures for measuring the thickness... You need to make sure that the block you put in there is just enough to make the switch make contact.
Somewhere between 1/8" and 1/16" inch should do it.
Yup, 5/16" wide form this angle too.
I found a piece of plastic from some food container that had thin plastic (I think it was a 2 liter bottle), and I cut it down to the size and folded it over and over until the thickness was right.
I didn't take a good shot because the spring kept popping out. But, if you drop it down between the black or orange trigger slider and the gray casing, it works perfect!
Remember, just put your plastic spacer right where the blue bar is in this picture... BE SURE TO PUT THE SPRING BACK! I don't have that in these pictures because it likes to pop out.
Finally... Don't do this... I took the whole thing out of the gun, broke a wire I had to resolder, etc...
No no no...
INSTEAD... leave the whole gray unit in the gun, and just take off the gray faceplate.
And remember, the big extra shell on the outside is also extra weight. I never put them back on. Just leave it like this.